Save & Reload Data
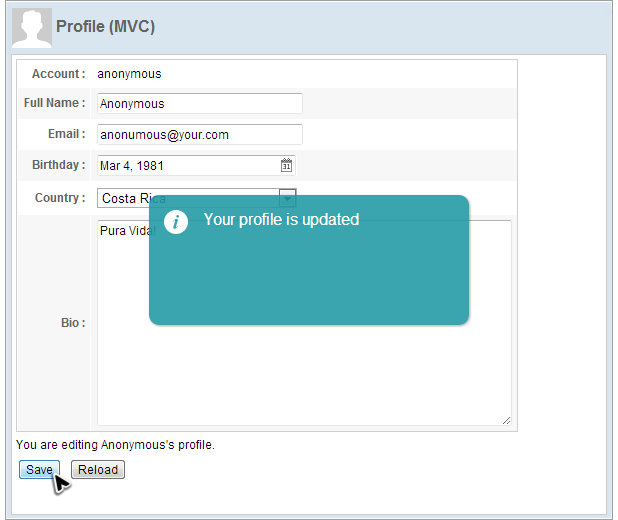
The example application has 2 functions, save and reload, which are both triggered by clicking a button. If you click the "Save" button, the application will save your input and show a notification box.

In this section, we will demonstrate a more flexible way to define an
event listener in a controller with @Listen other than
calling addEventListener().
An event listener method should be public, have a void return type, and
have either no parameter or one parameter of the specific event type
(corresponding to the event listened) with @Listen in a controller.
You should specify event listening rule in the annotation's element
value. Then ZK will "wire" the method to the specified components for
specified events. ZK provides various wiring selectors to specify in the
annotation.
Listen "Save" button Clicking
public class ProfileViewController extends SelectorComposer<Component>{

    @Listen("onClick=#saveProfile")
    public void doSaveProfile(){
        ...
    }
    ...
}
- Line 3: The
@Listenwill makedoSaveProfile()be invoked when a user clicks a component (onClick) whose id is "saveProfile" (#saveProfile).
We can manipulate components to change the UI in the event
listener. In doSaveProfile(), we get a user's input from input
components and save the data to a User object. Then show a
notification to the client.
Handle "Save" Button Clicking
public class ProfileViewController extends SelectorComposer<Component>{
....

    @Listen("onClick=#saveProfile")
    public void doSaveProfile(){
        UserCredential userCredential = authService.getUserCredential();
        User user = userInfoService.findUser(userCredential.getAccount());
        if(user==null){
            //TODO handle un-authenticated access
            return;
        }

        //apply component value to bean
        user.setFullName(fullName.getValue());
        user.setEmail(email.getValue());
        user.setBirthday(birthday.getValue());
        user.setBio(bio.getValue());

        Set<String> selection = ((ListModelList)country.getModel()).getSelection();
        if(!selection.isEmpty()){
            user.setCountry(selection.iterator().next());
        }else{
            user.setCountry(null);
        }

        userInfoService.updateUser(user);

        Clients.showNotification("Your profile is updated");
    }
    ...
}
- Line 7: In this chapter's example,
UserCredentialis initialized with "Anonymous". We will put a user data in chapter 8. - Line 14: Get users input by calling
getValue(). - Line 19: Get a user's selection for a
Listboxfrom its model object. - Line 28: Show a notification box which is the most easy way to show a message to users.
Handle "Reload" Button Clicking
To wire the event listener for "Reload" button's is similar as the previous
one, but we use a different selector this time. And the method pushes saved user data to components using setValue(), so we can just call previously-implemented refreshProfileView().
public class ProfileViewController extends SelectorComposer<Component>{

    ...
    @Listen("onClick = button[label = 'Reload']")
    public void doReloadProfile(){
        refreshProfileView();
    }

    ...
}
- Line 6: This method is listed in the previous section.
After the above steps, we have finished all functions of the target application. Quite simple, right? Please run /chapter3/index.zul to see the result.